The Positive Behaviors feature allows teachers and administrators to use positive reinforcement strategies to reward good student behavior. This is accomplished through the assignment of badges in Focus.
Badge Behavior Set Up
Schools/districts create badges first at the school/district level. This gives teachers the ability to create behaviors associated with each admin-created badge.
Teachers are able to use both admin-created badges and their own.
To begin setting up teacher badges, navigate to Discipline > Identify Badge Behaviors.

1. Enter a Title for your badge behavior.
2. Next select the Badge Type to associate with the new badge.
3. Click Select to choose an icon for your badge. The default icon for the badge type is displayed in the Icon column. You can use the default icon, or select/upload a new icon
Press Enter on your keyboard to add a row.
When you are finished click Save.

Reward Positive Behavior
The Reward Positive Behavior screen is used to award badges to students and spend badges. Teachers can also review the total badges earned, spent, and the available balance for students. A History is provided as well, with details about the date awarded, badge title, value, and comment.
To reward positive behavior, navigate to Discipline > Reward Positive Behavior
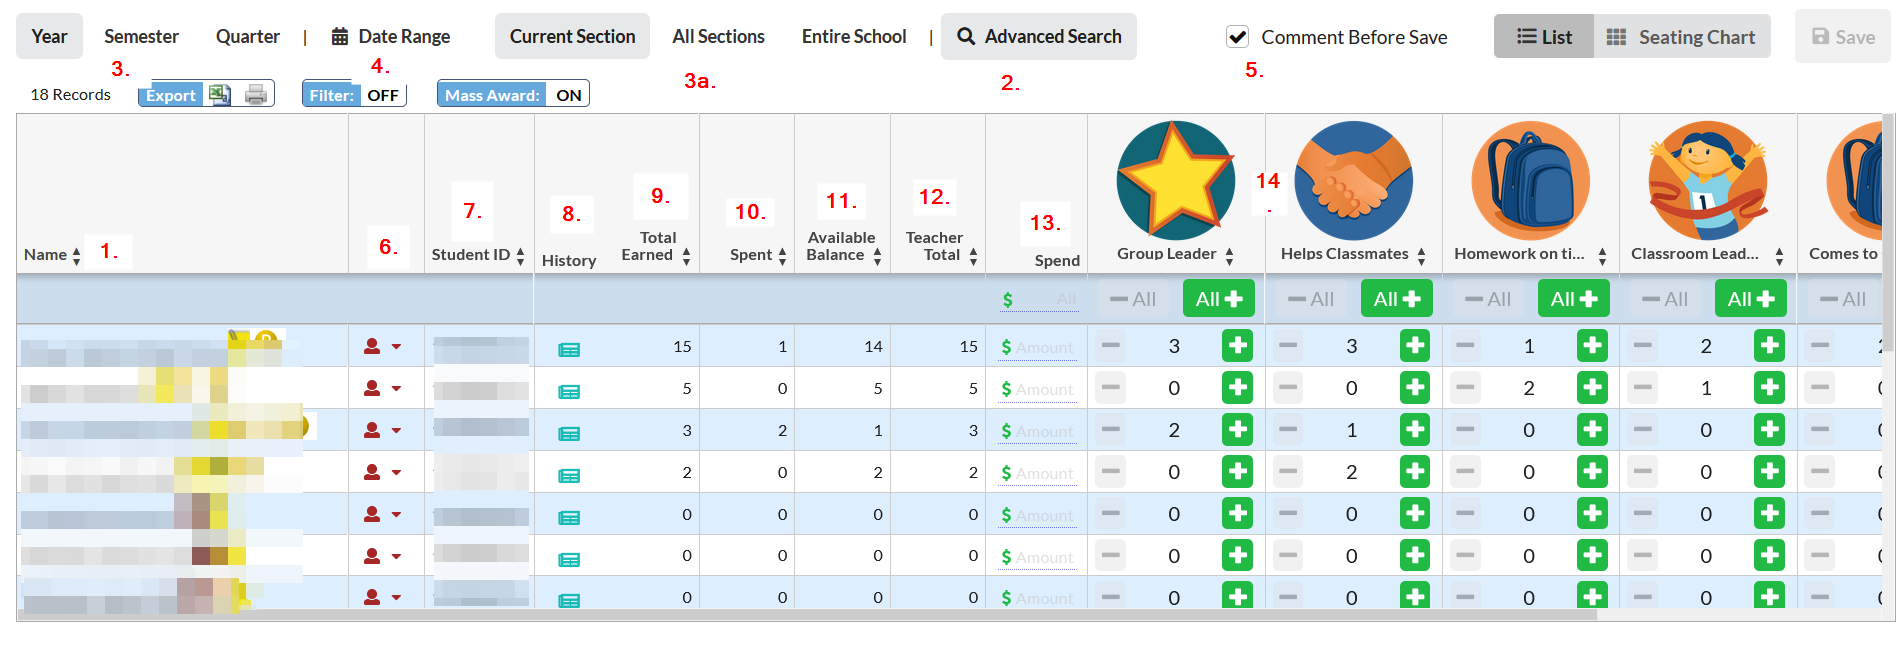
1. All the students in the teacher's current class are selected by default.
2. To refine the list of students, click Advanced Search at the top of the screen.
3. The Year option at the top-left of the screen is automatically selected, displaying the badge data from the start of the school year to date. To view badge data from the beginning of the semester to date, click Semester. To view badge data from the beginning of the quarter to date, click Quarter.
3a. The Current Section is selected by default. To view badge data from all sections the teacher is assigned, click All Sections. To view badge data from the whole school, click Entire School.
4. To view a custom date range, click Date Range. In the pop-up window, enter the date range by selecting the month, day, and year from each pull-down or click the calendar icons to select the dates from the calendar and click confirm.
5. Deselect the Comment Before Save check box if you do not want to be prompted to enter a comment when adding or spending a badge. Otherwise, a pop-up box will appear asking you to enter a comment for each change.
6. Use the arrow to jump to different student data categories.
7. The student id number displays.
8. Click on the History icon to display the student's badge history, including the dates awarded, the user who awarded the badge, badge title, value, and comments. Badges can be deleted from a student in the History.
9. The Total Earned column displays the number of badges earned for the period selected in the top right corner of the screen, including both teacher and administrator awarded badges,
10. The Spent column displays the number of badges spent for the period selected in the top right corner of the screen, including both teacher and administrator awarded badges.
11. The Available Balance column displays the balance that is available for the student to spend.
12. The Teacher Total displays the total number of badges you (the teacher) have awarded students.
13. Enter the number of badges to spend in the Spend column. *If an amount is entered that is greater than the student's available balance, the amount will auto-correct to equal the student's available balance*. The spent amount will be deducted from the student's available badges.
14. The icons for each possible badge display at the top of the report, each in its own column. Here you can see a breakdown of how many of each badge the student has earned. Click the green + icon in the column of the badge you want to award. Click the red minus - sign if the badge was awarded by mistake and should be removed.
Seating Chart Assignment
Positive Behaviors can also be awarded from the Seating Charts screen.
Navigate to Attendance > Seating Chart.
From the Seating Charts screen, click the Assign tab, then click the Awards (Positive Behaviors) tab. The default name for positive behaviors is Badges, but the name is customizable by the district; therefore, the name of the tab could differ.
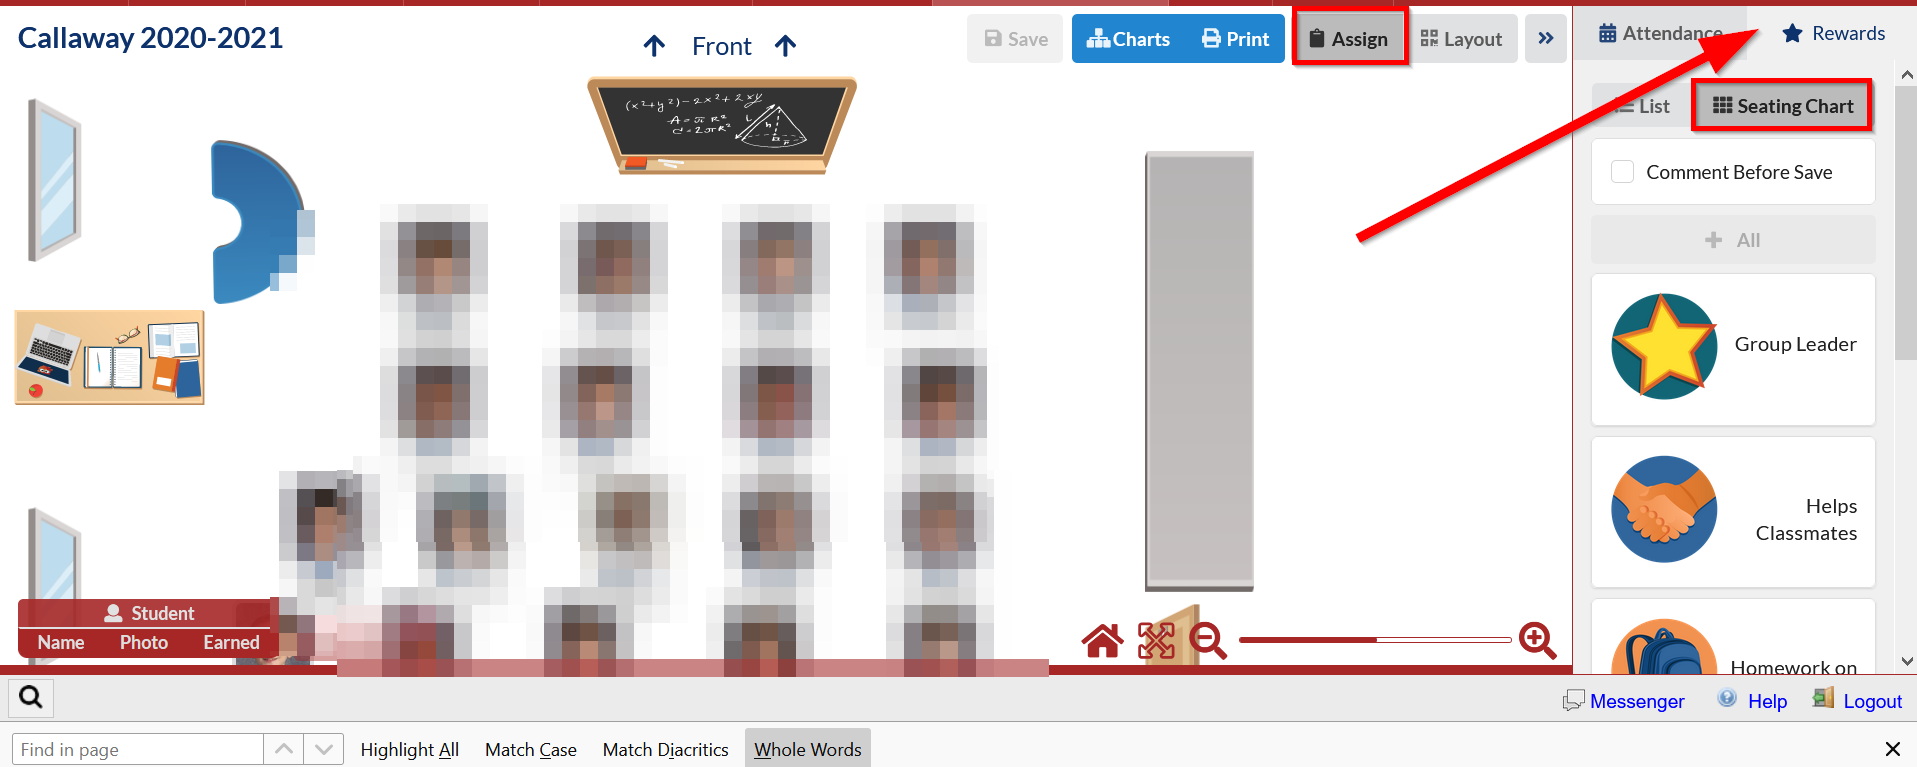
To award a positive behavior, click the behavior, then click the applicable students in the seating chart.
The behavior icon displays on the student until saved.
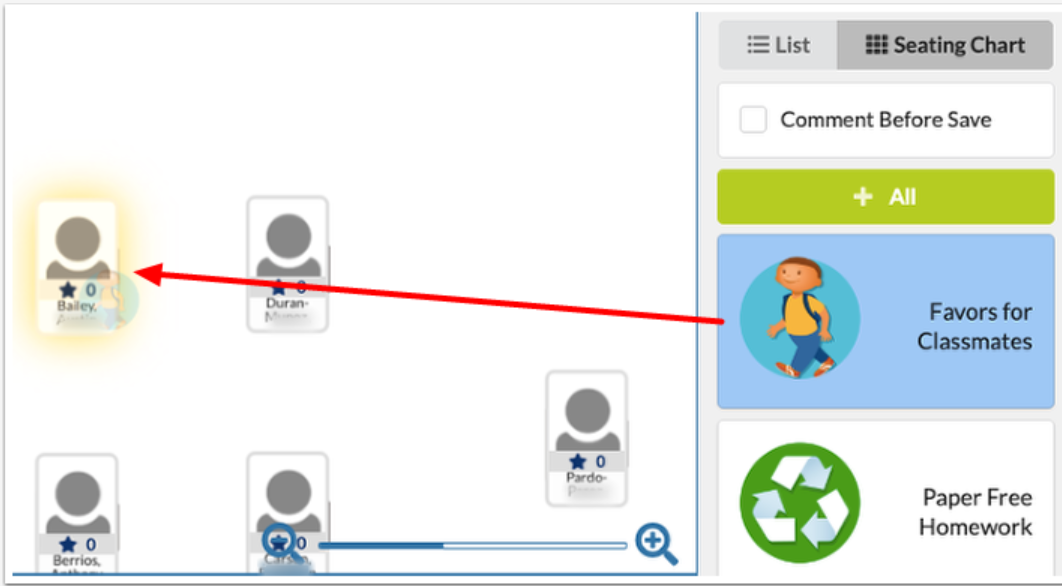
Click Save to apply the positive behaviors. Once saved, the number of behaviors awarded displays next to the star icon.