There are many times during the course of the school year where you will need to change student schedules. It is important that the student's courses are added/ dropped correctly to ensure accurate, report cards, state reporting and teacher access.
Dropping an Existing Course
If a student has attended a class at least once and has a schedule change then the course must be dropped from their schedule.
To access a student's schedule navigate to Scheduling> Student Schedule>Search for the student whose schedule you would like to change.
Locate the column titled Dropped.
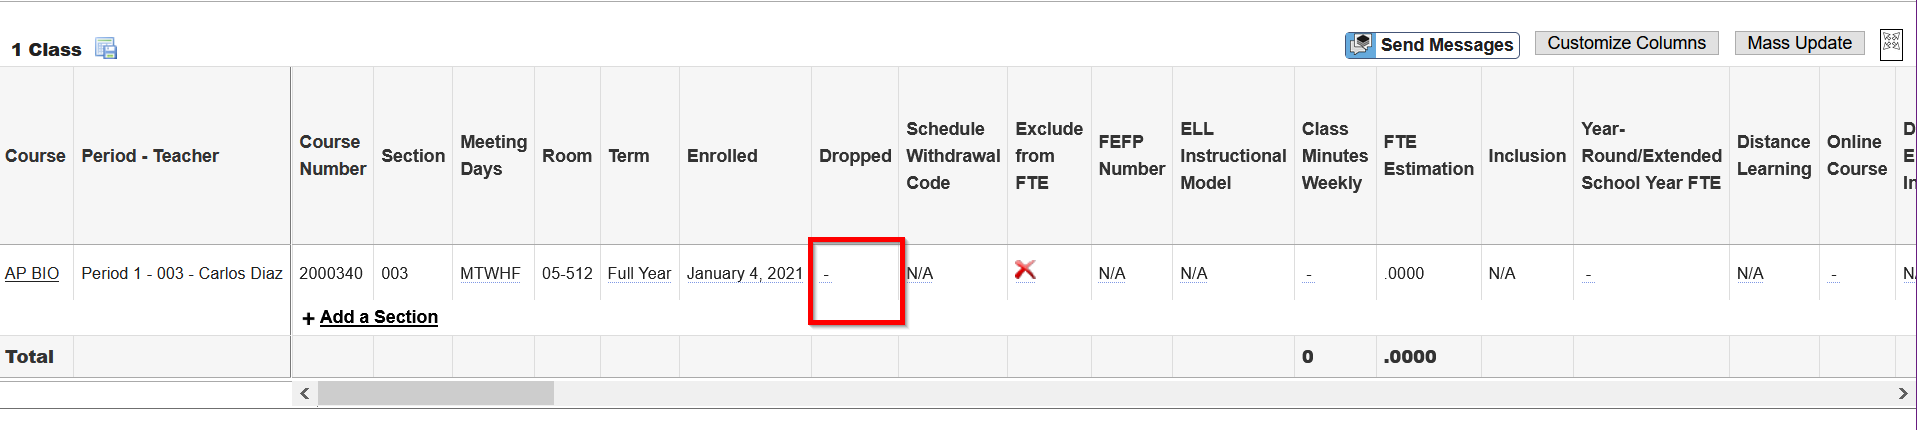
Click on the dash under the drop column next to the course that should be dropped from the student's schedule.
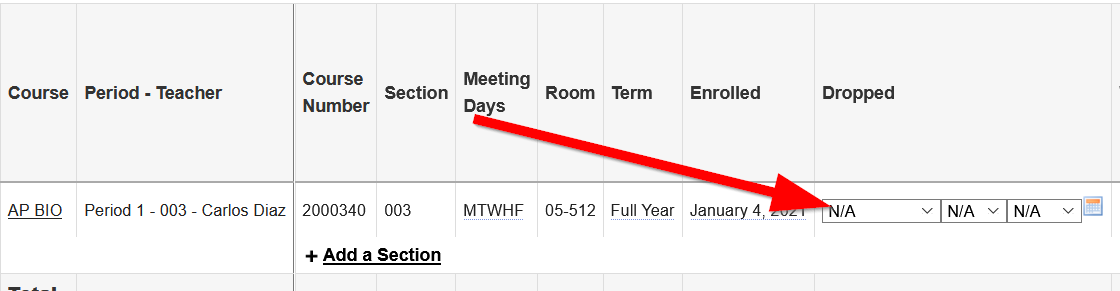
Doing this will expand the dash and display date fields.
Here you should enter the date the class should be dropped. The drop date is the last date the student attended the class.
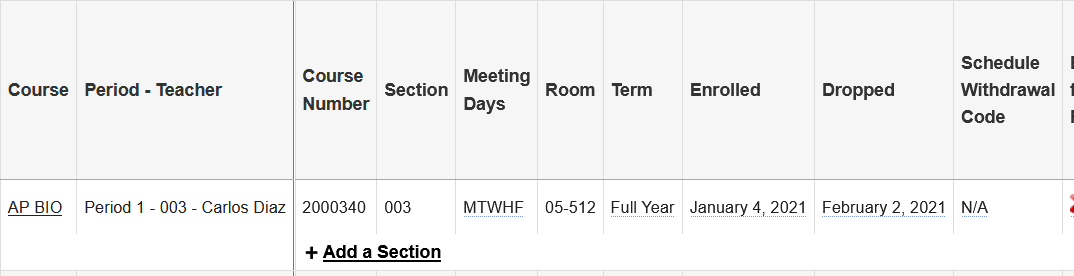
Entering the drop date will inactivate the class for the selected student. This means that the teacher will no longer see this student in their active students list for attendance or grades. They will need to click include inactive to view dropped students.
Once a class is dropped from a student's schedule the class will no longer show on the student's schedule unless the user clicks Include Inactive Courses located at the top of the student schedule screen.

Dropping a Class added in Error
If the student was added to the class by mistake and NEVER actually attended the class than you have the ability to delete that class.
To do this change the enroll date to a date in the future and click Save.
Once saved you will see a delete checkbox at the beginning of the schedule record.
Check the delete checkbox and click save. This will remove the record that was added in error.
Mass Update Schedule Reports
You are able to drop the students entire schedule at once using the mass update option.
From the student schedule, click Mass Update, located in the top right side of the schedule. Mass update options will then appear at the top of the schedule. Use the pull down menu to select the field you would like to mass update, in this case Dropped. Next enter the date you would like populated on each schedule record.
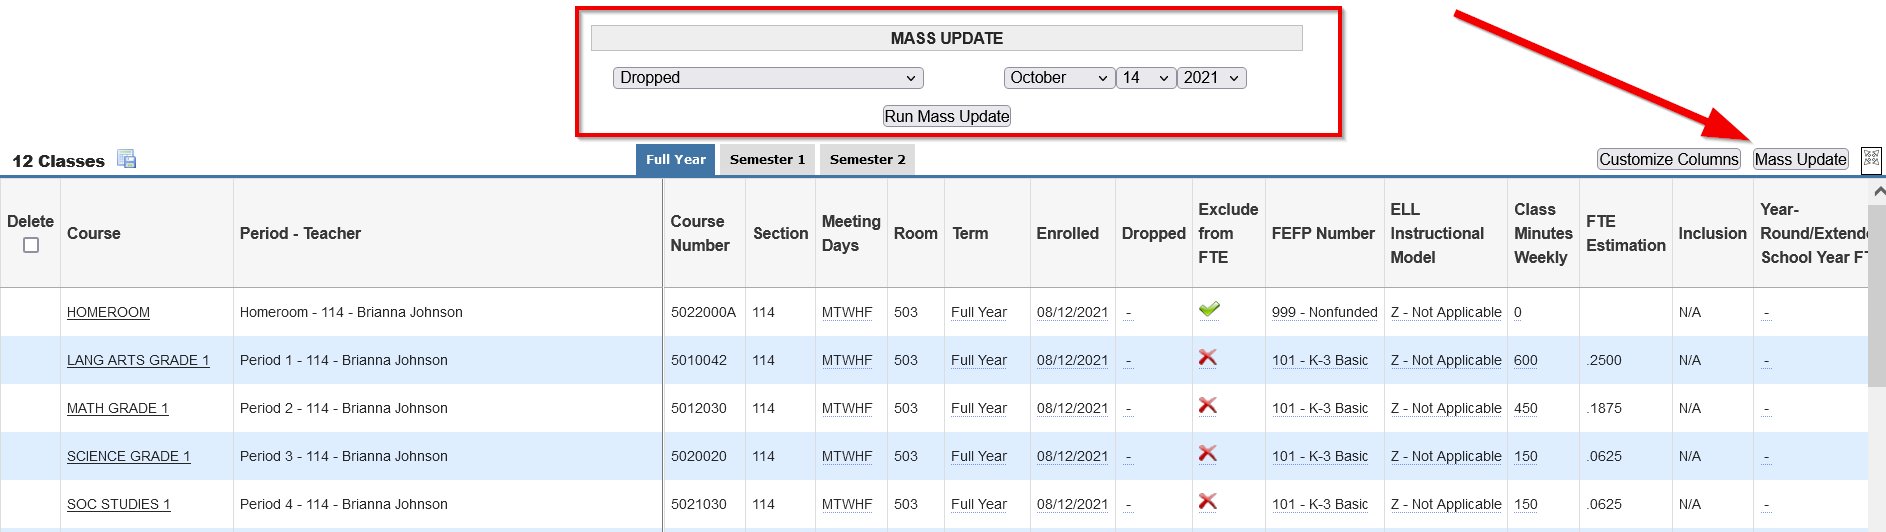
Once you have made your selections click Run Mass Update. All of the schedule record dates will populate with your selection. To save your changes click Save.

Adding a Class to a Student Schedule
Before adding a class to a student's schedule make sure you know the period, teacher, and start date of the course.
Navigate to the student whose schedule you would like to modify. Go to Scheduling > Student Schedule> Search for the student and click on their record.
There are 2 ways to add a class to a student's schedule.
1. Click the plus sign next to Add a Section. Doing this will generate a pop-up of the courses and sections screen. Here you must select the category, course number, and then section of the course you would like to add.

2. Another way to add a class is to use the search boxes located below the schedule to enter search criteria. For example, if you know you need a 3rd-period course you can select 3rd period from the Period pull-down, click search and see a list of all period 3 classes in your school.
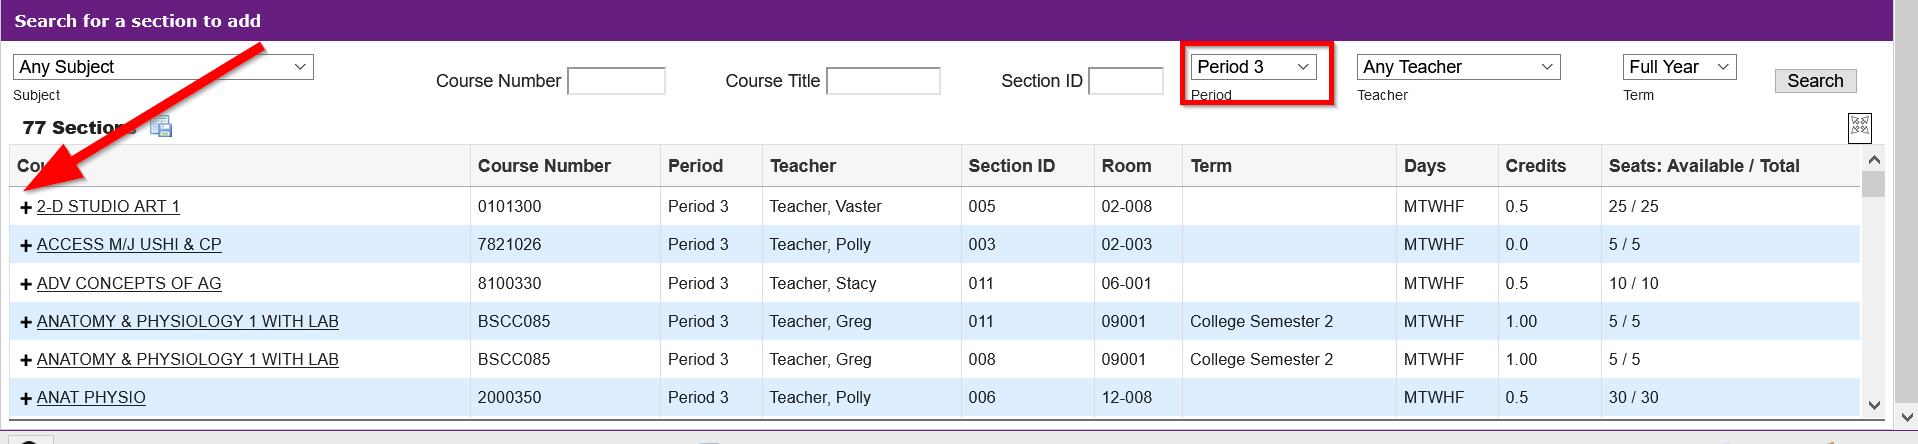
This view will show you both the total and available seats so that you can easily identify if there is room in the class for your student. Once you have located the correct course click on the plus sign next to the class to add it.
The class will be added with an Enrolled date equal to the day you have added the class for all full-year classes.

The Enrolled date should equal the first day the student attended the class or WILL attend the class for classes scheduled in advance.
At a minimum, it is important that you verify that the Room, Class Minutes Weekly, and FEFP are correct for the selected student.
If you are unsure about the data that should display on the schedule please contact your MIS department.